Beginner Home Recording Setup for Singers: Everything You Actually Need (And What to Skip)
I may earn commission from links on this page, but I only recommend products I actually use and would buy again.
Hi Friends!
If you're trying to start recording at home and keep talking yourself out of it because you don't have the right setup yet, this is for you. Especially if you're already working with less energy, less bandwidth, or a body that doesn't always cooperate. You don't need more friction. You need a setup that gets out of your way.
Last October, I recorded and posted a Lady Gaga cover every day for 31 days using this exact setup. The whole point was to face my fear of being seen, and to prove to myself that I couldn't keep waiting until conditions felt right to start creating.
Want the full story behind the challenge? Read the original essay here.
Making things is a form of self-care that nobody really puts in that category, but it probably should be there. Music is mine, the thing I come back to when life has already taken everything out of me. It's the same way I approach everything else on here the way I do, I find what works, cut what doesn't, and make it easy enough for us to actually do.
One of the first decisions I made was to keep the setup as simple as possible, because I knew that if recording felt like a production, I'd find a reason to skip it. My rule with anything creative is simple: if it takes too many steps, I won’t do it, so I build everything to be as frictionless as possible.
I didn't build a studio, I removed excuses. What I ended up with was a handful of affordable items, one genuinely ridiculous DIY situation, and zero regrets about not having more gear. This is your beginner home recording setup for singers. You don’t need to upgrade anything else until this setup stops working for you.
What You Need for a Beginner Home Recording Setup for Singers
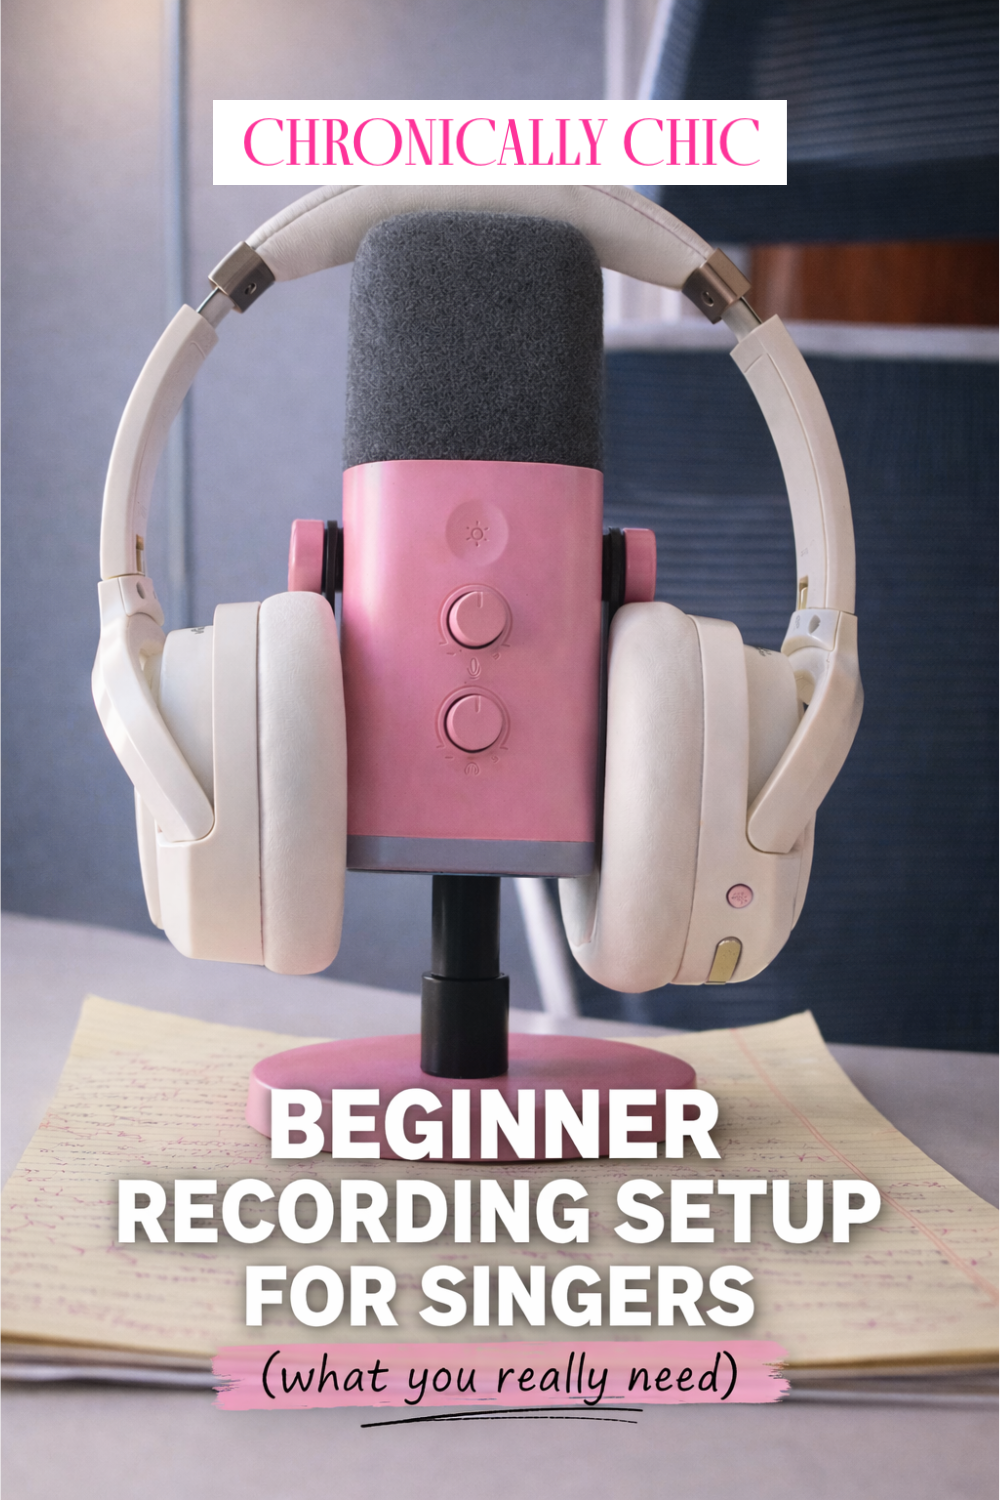
USB condenser microphone (Fifine):
I actually started the challenge with just my laptop mic, but my fiancé Jon quickly realized how much a real mic would improve my recordings and surprised me with this pink one.
It plugs directly into your computer with no audio interface, no driver headaches, nothing to figure out before you can start. I used this Fifine one from Amazon. The difference between the first few and the rest was extremely noticeable, but even those OG's weren't unsalvageable, so use what you've got and don't go for the pro-level before you need to.
Over-ear headphones (Heyday):
Mine were from Target. Nothing special. You just need something comfortable that lets you hear yourself clearly, because if they're annoying to wear, you'll find excuses to skip them, and hearing yourself while you record is worth it.
Acoustic foam panels:
Basic foam panels from Amazon. Just enough to knock out the worst echo so the recordings didn't sound hollow. You're not solving every acoustic problem. You're just making it usable.
A pack of 4 panels was enough to line the inside of the pull-out storage box I used for my DIY soundproofing setup, but I grabbed a 24-pack because I was planning to eventually set up a more permanent recording area downstairs. That didn't happen since we're moving, but having extras came in handy since my cat decided the box was his personal scratching post. Search 'acoustic foam panels' on Amazon and stay under $40 for a 24-pack.
DIY soundproofing setup:
I lined an old pull-out storage box from a media cabinet with the foam panels and propped it on my desk on top of a Chirp Wheel — yes, my back roller — because that happened to be what was nearby. It wasn't pretty, but it made a real difference in how recordings sounded, and I used it every single day once I had the new microphone.
GarageBand (free on Mac):
I recorded and mixed everything in GarageBand. It's free, it's already on your Mac, and it does more than enough for this kind of project. If you're on a PC, Audacity is the free equivalent. I used it back in high school, and even then, it was simple enough to figure out on my own. It's not as intuitive as GarageBand, but it absolutely works, and little teenage me was happy with the results. Neither requires any setup beyond plugging in your mic!
Home Recording Gear You Can Skip as a Beginner
No audio interface:
The internet will make you feel like this is non-negotiable. It isn't, at least not at the start. The USB mic handled everything.
No mic stand:
It would have been convenient. It wasn't necessary, especially since my mic was tabletop.
No pop filter:
The mic I got had a bit of a foam top, but an added pop filter would have helped with clarity and consistency. I'd actually add if I were starting over, but not having it didn't stop me from starting, which is the point.
No random curated gear list from a recording forum:
This is genuinely where most people stall. You go looking for what you need, you find seventeen opinions, you add things to your cart, and suddenly, starting feels contingent on having the right equipment first. It isn't.
The One Piece of Gear Worth Adding Next
A clip-on pop filter:
Like I mentioned, a cheap, easy-to-attach pop filter would have made recordings more consistent from day one. This is the only piece of gear I'd prioritize adding immediately. Which kind depends on your mic setup.
If you're using a tabletop mic like mine, go with a ring stand style, it props up independently and sits right in front of the mic without needing anything to clip onto. If your mic more of the tradtional kind already on a boom arm or stand, the slip-on kind is easier and cheaper. Either way, under $15 and worth it from day one.
Why Keeping It Simple Worked
Every piece of this beginner home recording setup was chosen to make it as easy as possible to actually show up and do the thing, because I knew that the version of me who recorded imperfectly every day would end up somewhere much better than the version who waited until the setup was right.
If you're hesitating because you don't have the gear yet, or because what you have doesn't feel good enough, that hesitation is worth examining. The barrier to entry for home recording is genuinely lower than the internet wants you to believe, and "enough to start" is a much lower bar than most people set for themselves.
There were days I recorded when I was tired, in pain, or just not feeling it. The only reason I didn't skip was that the setup asked almost nothing of me. A beginner home recording setup for singers doesn't need to be expensive or complicated, it just needs to have as few steps as possible between you and pressing record.
I'll always choose a setup that makes it easier to show up over one that looks impressive, because that's the only reason I finished anything at all. If you're stuck in research mode: just get the mic, skip everything else, and start. The version of you who starts imperfectly will always end up further than the version who waited.
Quick Links
If you want to keep up with what I’m working on, I share it on my email list here.
What's the one thing that's been stopping you from hitting record? Drop it in the comments, I'd love to hear it!